


How to Combine Two Images in Paint 3D
Combine two photos in Paint 3D by opening one image, inserting another, arranging them on the canvas, and saving the result.
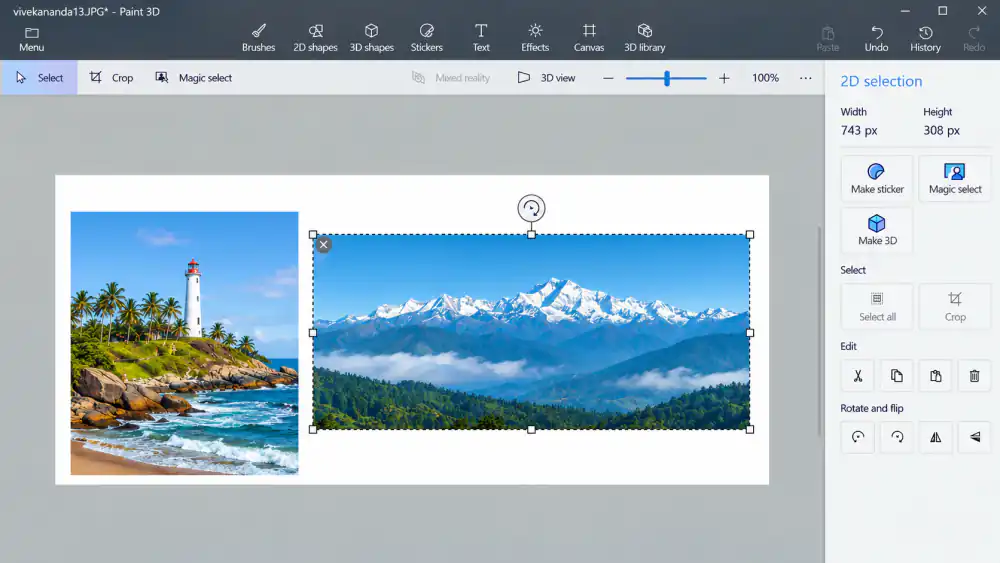
Want to put two pictures side by side or place one image over another? You can do both in Paint 3D without using a separate collage maker.
The easiest method is to open the first image and insert the second one into the same project. Here's how.
How to Put Two Pictures Together in Paint 3D
Open the First Image
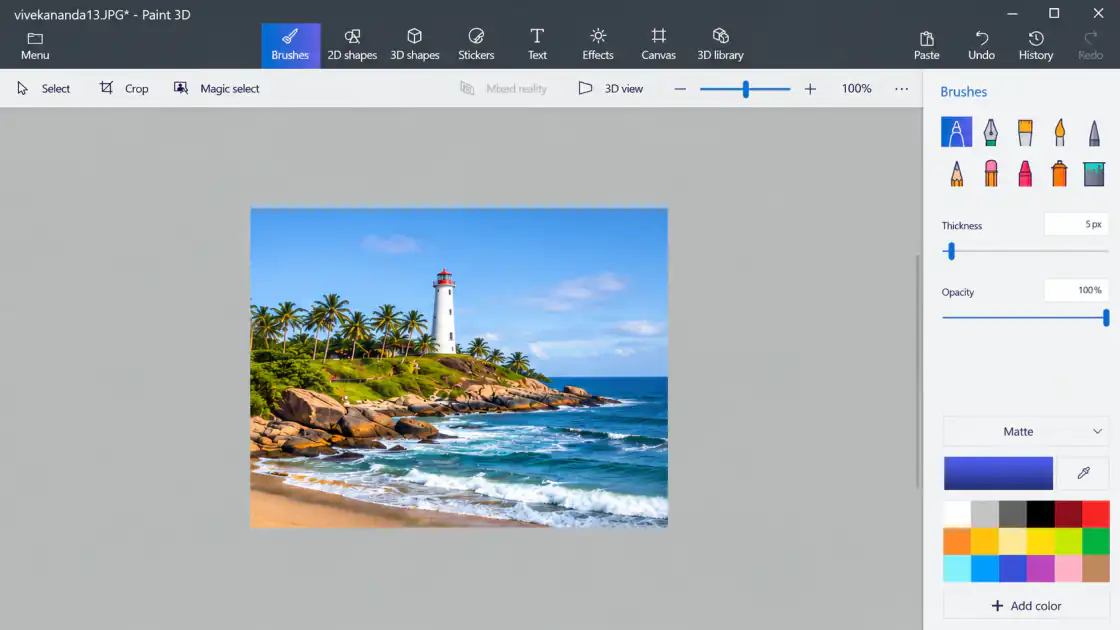
Launch Paint 3D and choose Menu > Open > Browse files. Select the first photo. This will be your starting image.
If you're making a side-by-side comparison, choose the photo you want on the left. If you're creating an overlay, open the background picture first.
Make Space for the Second Picture
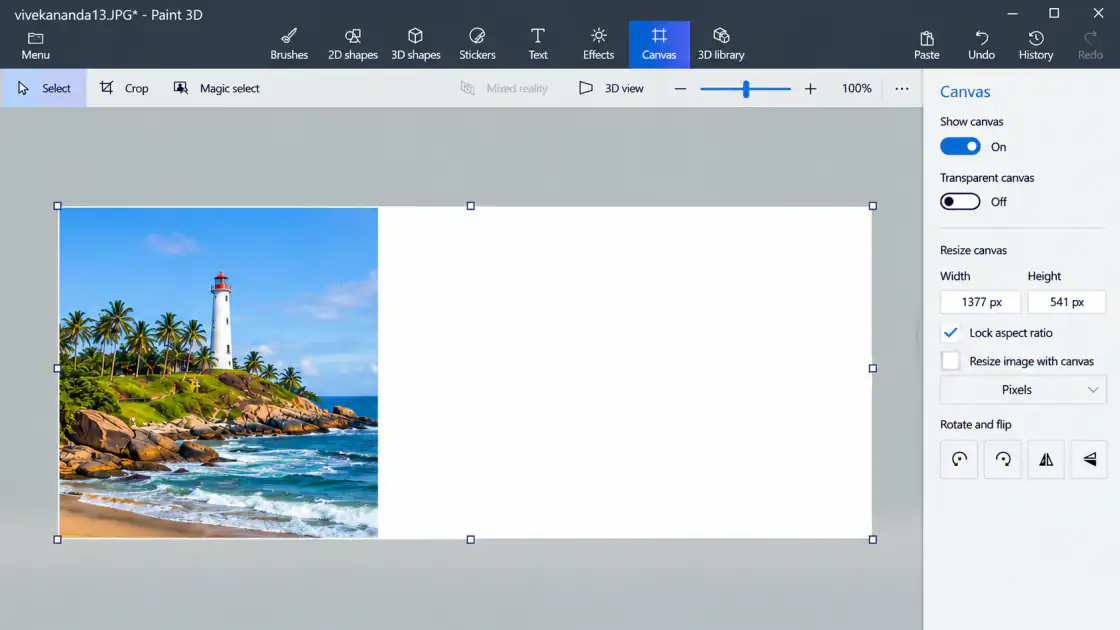
Click Canvas and check how much room you have. For two side-by-side pictures, you may need to increase the canvas width.
Turn off Resize image with canvas if you want to enlarge the available space without stretching the first photo. You may also need to unlock the aspect ratio to change only the width.
Insert the Second Image
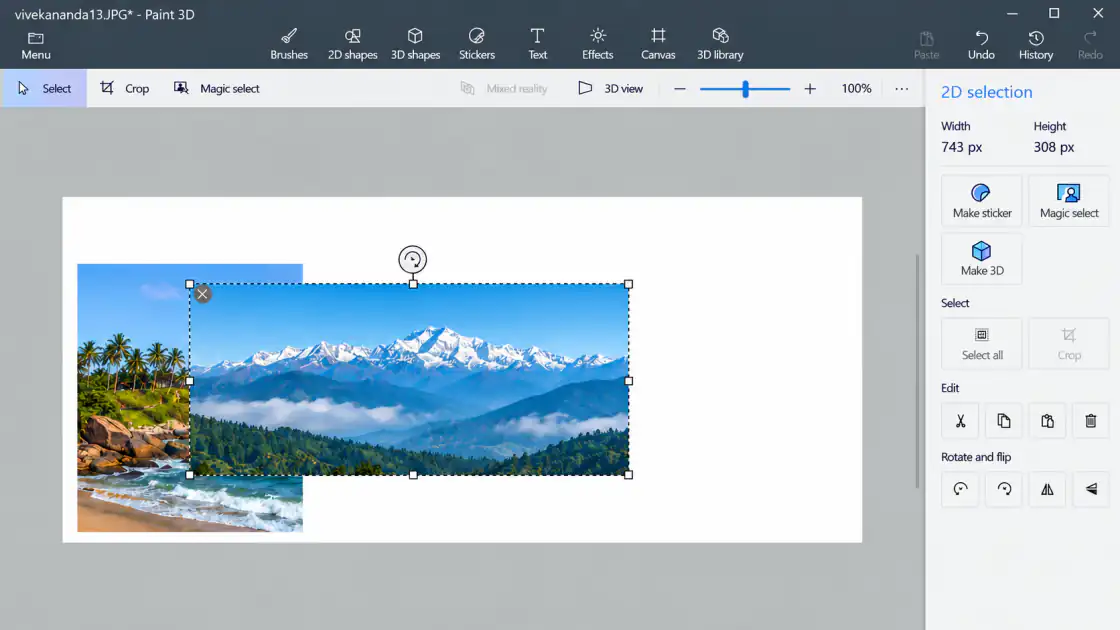
Go to Menu > Insert and select your second picture. Paint 3D will place it in the current project, often on top of the first image.
While it's selected, drag it into position and resize it using the handles. If you're making a comparison image, try to keep both pictures at similar heights.
Arrange and Save Both Images
Check the spacing, edges, and overall layout. Once you're happy with it, click Menu > Save as > Image and save your combined picture as PNG or JPEG.
Keep copies of the original images in case you want to create a different layout later.
How to Put One Image on Top of Another
For an overlay, use the first picture as your background and insert the second picture over it. If you want the background to show around the inserted object, use a transparent PNG for the second image. A normal JPEG may bring a solid rectangular background with it.
Side-by-Side vs. Overlay: Choose the Layout First
For a before-and-after image, you usually want both photos the same height, with a little space between them. Widen the canvas, insert the second picture, and line up the top and bottom edges. If one photo is much taller than the other, resize or crop it before arranging the pair so the comparison doesn't look uneven.
For a picture-on-picture overlay, keep the first photo as the full background and insert a smaller image over it. You might use this to put a logo in a corner or show a close-up of one part of a screenshot. A transparent PNG is ideal when the inserted object shouldn't have a box around it.
Why the Second Image Covers the First
That's normal: Insert places the new picture into the existing canvas, often directly on top of whatever is there. While the inserted picture is selected, drag it to the intended spot and resize it with the corner handles. If you need more room, go back to Canvas settings rather than shrinking both images until they're unreadable.
A Quick Check Before Saving
Zoom out and look at the entire composition. Are the margins even? Is there enough space for any captions? Are both screenshots readable at the size the final image will appear on the page? It helps to decide these things before exporting, because a normal image export flattens the arrangement.
Frequently Asked Questions
Why does opening the second picture replace the first?
You probably used Open instead of Insert. Open loads a different file, while Insert places another image into your current project.
Can I move the images after saving?
Once you export a regular PNG or JPEG, the two pictures become one flat image. Keep your original files and any editable project versions if you want more flexibility.