


How to Make Background Transparent in Paint 3D
Make a background transparent in Paint 3D, remove unwanted white areas, and save your design as a transparent PNG.
You've finished an icon or a small graphic in Paint 3D, and now you want to put it on a slide or a website. But when you save it, there's a big white box behind it. That usually means one of two things: the white area is still part of the actual picture, or the file was saved without transparency.
Paint 3D can save images with transparent backgrounds, but Transparent canvas and removing a background aren't the same action. If the white space is baked into a photo, switching on transparency won't erase it. Below, I'll show you which setting to use and how to tell whether the background is really gone.
Steps to Make an Image Background Transparent
Open the Image and Check Its Background
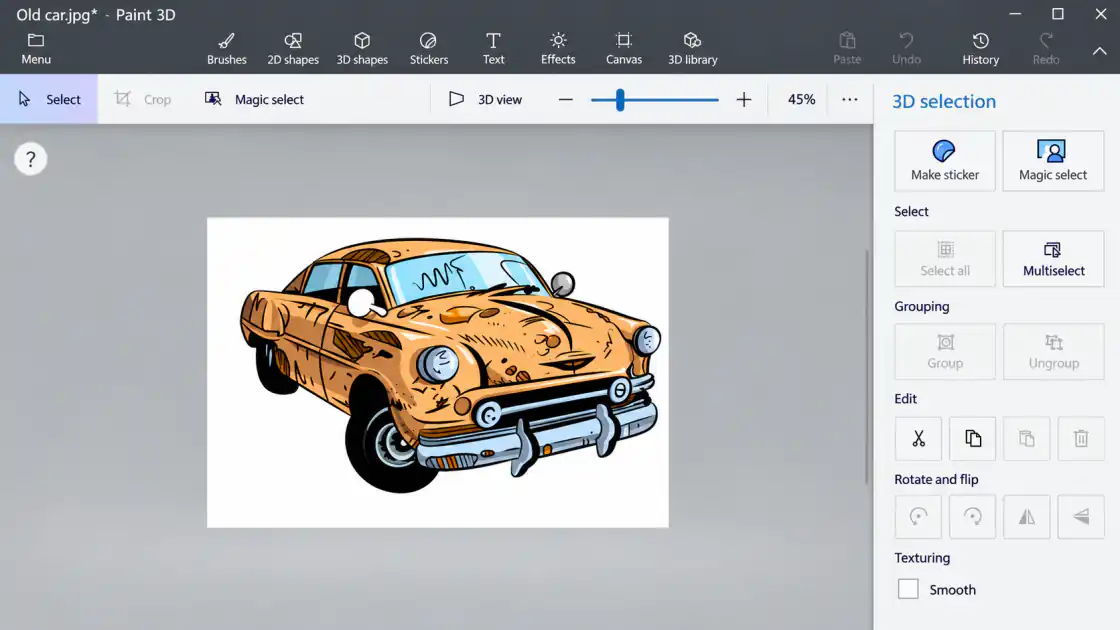
Open your picture in Paint 3D. Look closely at the area behind your subject. If it's a solid white or colored background within the picture itself, use Magic select to cut out the part you want to keep. Then remove the original background.
If you're working on artwork with empty space around it already, you can skip this part.
Enable Transparent Canvas
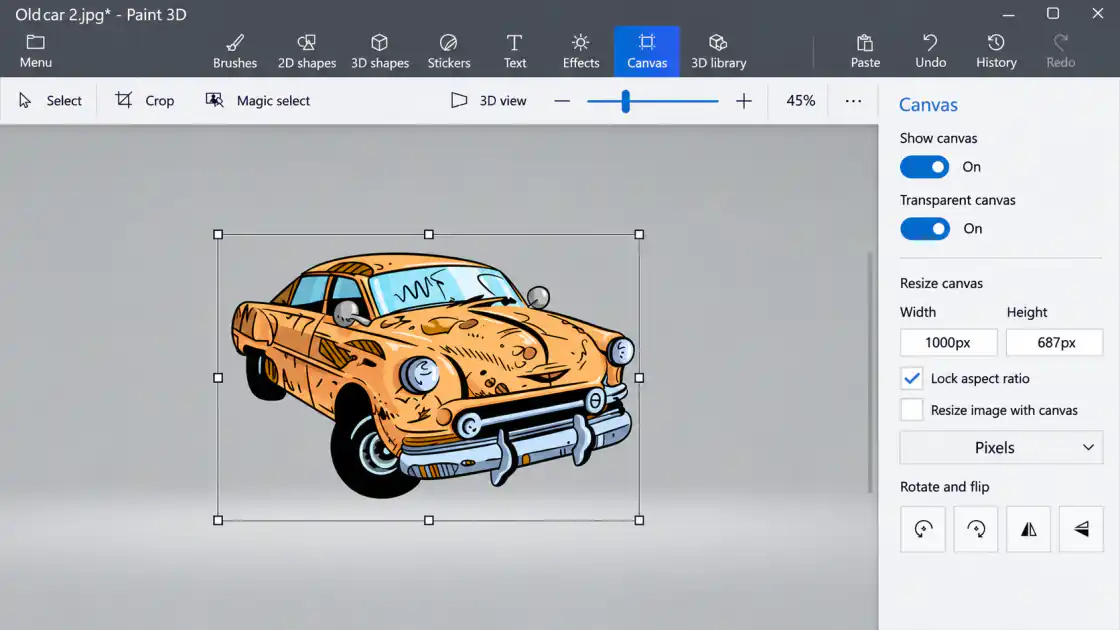
Click Canvas on the top toolbar. Look for Transparent canvas in the panel on the right and switch it on.
This makes empty areas of your canvas transparent. It doesn't erase white pixels that are still part of the artwork.
Choose PNG When Saving
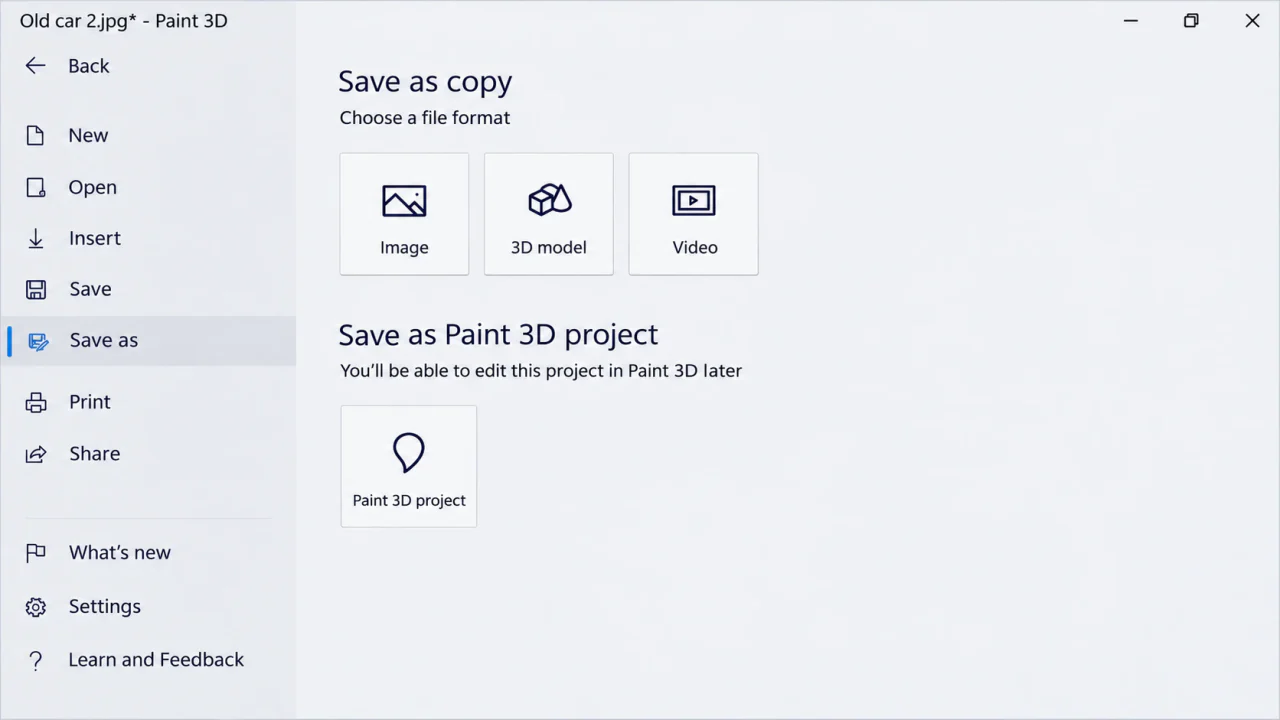
Go to Menu > Save as > Image. Choose PNG from the file format options. PNG supports transparent backgrounds, while JPEG doesn't.
If you see a Transparency checkbox in the export window, enable it.
Save and Check the Result
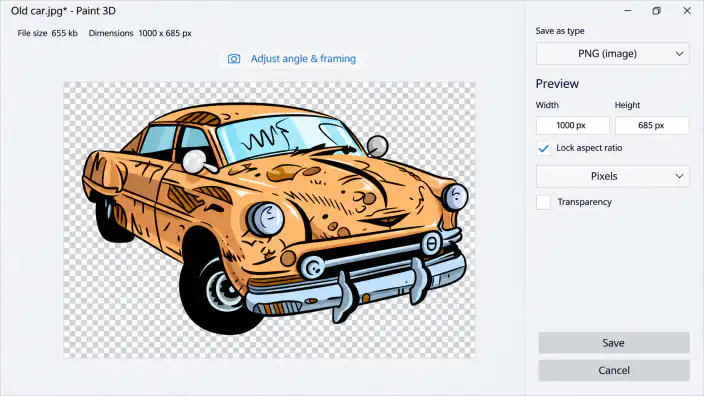
Before saving, look at the preview. The checkerboard pattern should appear wherever the background is transparent. Save the file and open it over a different background color to make sure everything worked.
Transparent Canvas vs. Removing a Photo Background
These two actions are different. Transparent canvas makes empty canvas space transparent. Magic Select helps you separate a subject from background pixels inside a photo. If your image already includes a white rectangle behind the subject, you'll usually need both tools.
What Actually Counts as a Transparent Background?
A transparent image has pixels that let whatever sits behind the image show through. A white background looks empty, but it isn't transparent. That's why a logo with a white rectangle might look fine on a white page and suddenly look wrong when you place it on a colored slide.
When you preview a PNG export, transparent areas are often shown as a gray-and-white checkerboard. That pattern is only a preview; it won't appear in the final image. If you can see the checkerboard around your artwork, you're on the right track. If you see a solid white rectangle, check whether those white pixels are still part of the image.
Two Situations That Need Different Fixes
You've drawn on an otherwise empty canvas: Switch on Transparent canvas and save as PNG. You generally don't need Magic Select because there's no photograph behind your drawing to remove.
You've opened a JPG with a white background: The white is part of the picture. Use Magic Select to separate what you want to keep, remove the original image, and then export as PNG. Simply switching the canvas setting won't cut out the subject.
It's worth saving a separate project copy before experimenting. If your first export doesn't work, you can return to the editable version rather than starting from the JPG again.
Frequently Asked Questions
Why does my transparent PNG still look white?
Some image viewers show transparency on a white background. Test your file by placing it over a colored image. If the white background stays visible, go back and remove the white pixels before exporting again.
Can I save a transparent image as JPEG?
No. JPEG doesn't support transparent pixels. Choose PNG if you want the background to remain transparent.